It’s easy to tell when Richard Tipper has just been in a car: not only will it be as spotless as when it first left the factory, but every single switch and vent will be straightened and lined up, to the inch. Even the seating positions will match. It’s his fixation with the details that make Tipper the perfect professional for the next topic in the #GetCreativeWithPorsche lockdown series – car detailing.
Ever since he passed his driving test 31 years ago, Tipper has had something of an obsessive approach to cleaning cars, discovering and using a host of techniques and products to ensure they’re perfectly polished. He’s built up an enviable roster of customers spread all over the world, from people with 200 cars in their collection to pride-and-joy vehicles; from $65 million prized jewels to daily drivers. All receive Tipper’s same attention to detail.

Having worked on so many, Tipper is a huge Porsche fan. A Cayman R is now his treasured possession. Because he’s stripped and cleaned parts that most people don’t even know exist, he says he has developed a unique understanding of the passion that goes into building cars. “I’ve detailed the Carrera GT several times and when that car is in bits, you can see the care that the Porsche engineers have taken with every single aspect. It’s clear that the finest materials and knowhow have gone into building it. For me, the Carrera GT was a milestone in quality.”
Tipper, too, is a man who pays careful attention to everything. “I come from a family that looks after things. My dad was a perfectionist – in fact, he even used to clean his car after it had been washed by the local valeting guy, just because he enjoyed doing it. ”
It usually takes Tipper two days to fully detail a car, while some need as long as a week as he goes to the sort of lengths that include stripping under trays off to clean silencers or removing the wheel arch liner and cleaning the pipes and brake lines behind them. Often, he will even take the seats out to get the last vestiges of crumbs and dust out of the cabin.
Since joining social media with the @perfectionvalet handle, he’s amassed an impressive following on Twitter® and Instagram®. Below, he shares some of his tips to help enthusiasts enjoy their cars during lockdown, even when they can’t be driven.
Share photos of your own, highly polished cars, using the #GetCreativeWithPorsche hashtag on Twitter and Instagram, and Tipper and the Porsche Newsroom team will share some of the best over the coming days.
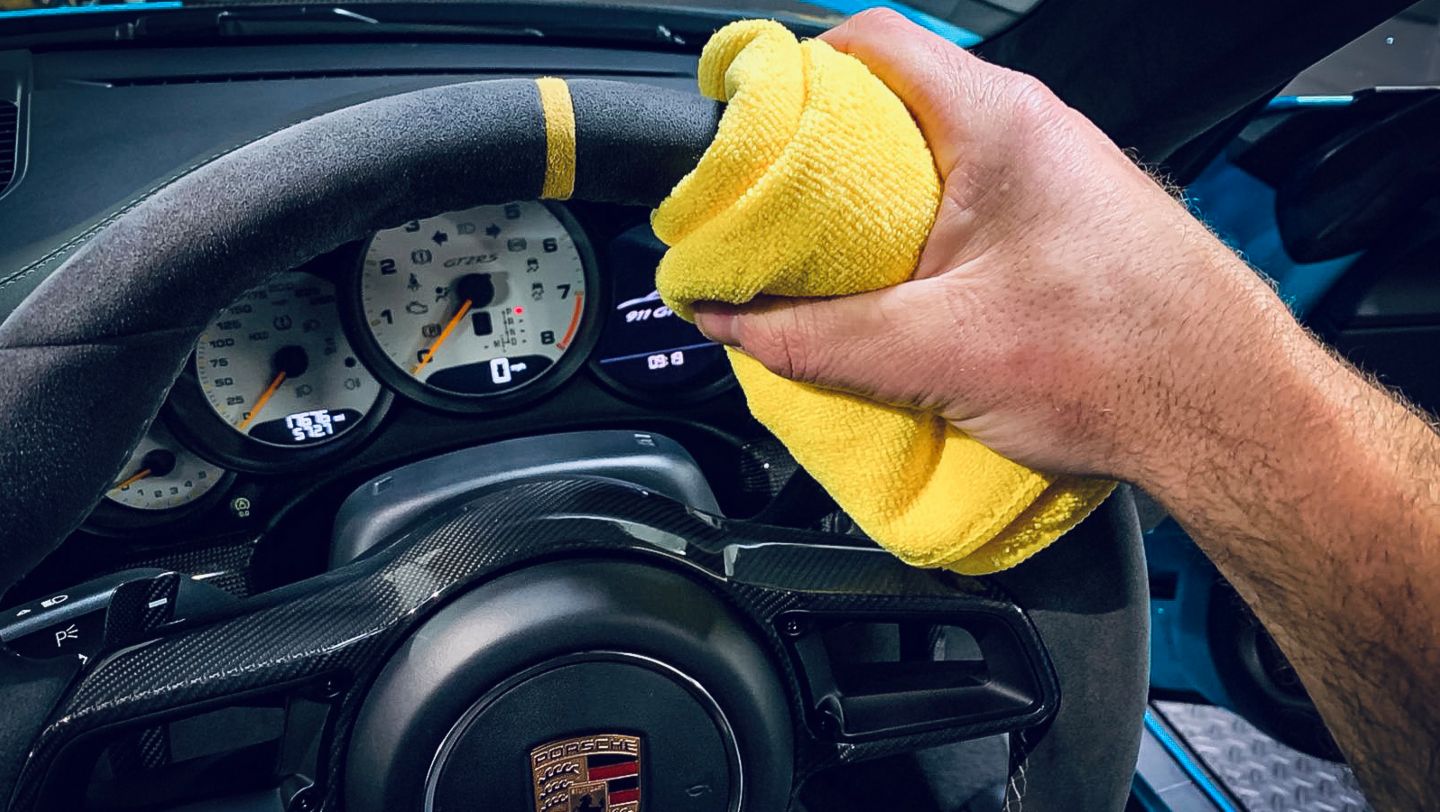
How to make an Alcantara® steering wheel look like new
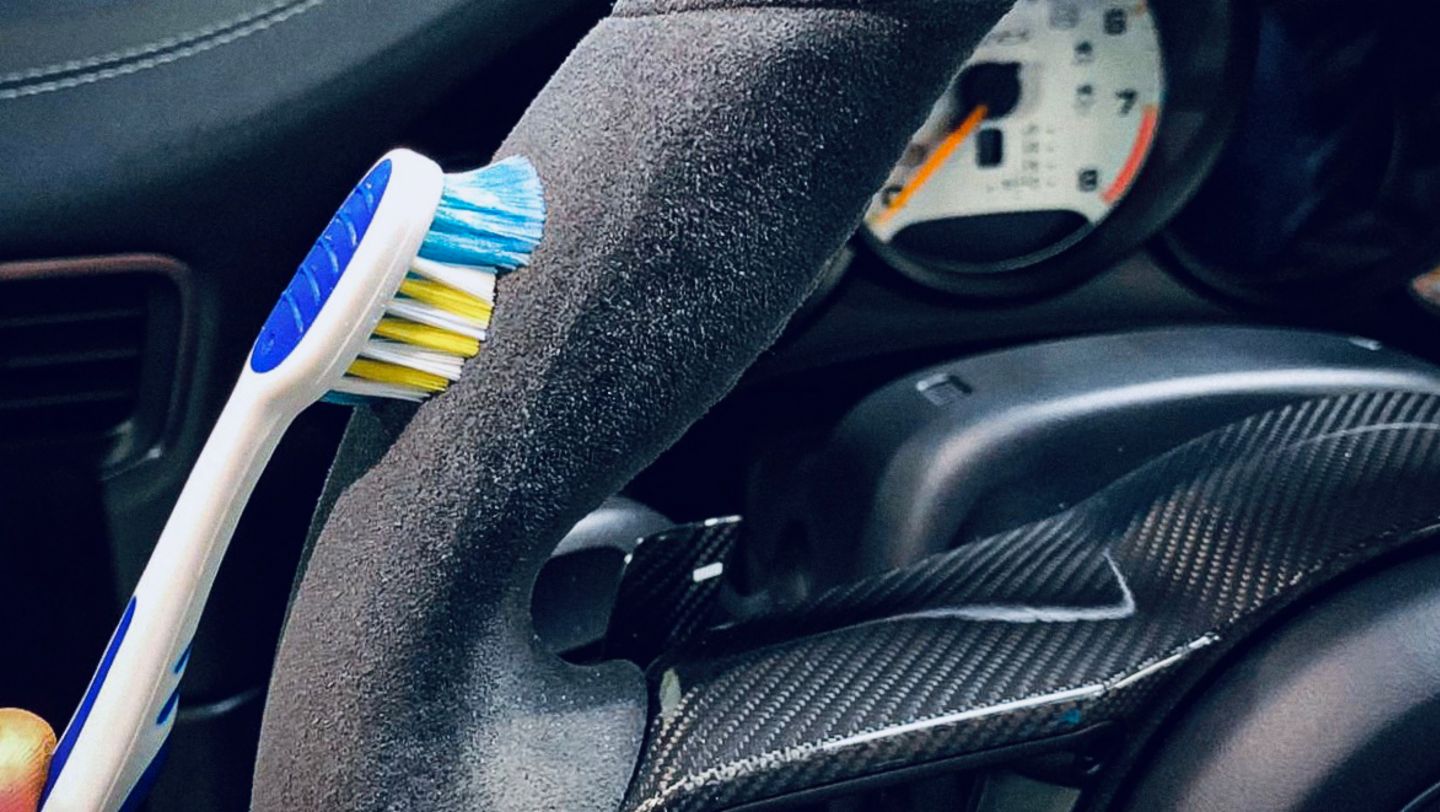
This is the question I get asked more than any other. Alcantara® is a man-made product that consists of lots of tiny ‘piles’, or fibers, of material. These piles get flattened by constant use, as well as the sweat and grease off the driver’s hands. Over time, it looks like the fabric’s been worn away, but in fact it’s just congealed grease, lovely thought that that is … What we need to do is remove that grease and fluff the pile back up.
- Use any fabric cleaner, although preferably an automotive one. Spray it onto the wheel, concentrating on a single quarter at a time. Don’t spray too much – if you soak the wheel, it’ll make the Alcantara® brittle when it dries out. Then take a warm, damp microfiber cloth, wrap it around that quarter and then start to work it by gently twisting the cloth: you’re trying to transfer the dirt onto the microfiber, so imagine you’re twisting a motorbike grip.
- Now move onto the next section. If there are any particularly bad areas such as the thumb grips, use a single finger wrapped in the microfiber to concentrate on those.
- Next use a dry microfiber cloth to absorb as much of the damp as possible, again rubbing the wheel to try to bring the fluffiness back.
- Then walk away - leave the wheel for a couple of hours to really dry out.
- Once it’s dry, and to really bring the softness back, take a clean toothbrush and gently brush the material.
- You can use the same technique on other areas of Alcantara®, but beware of using a plastic vacuum nozzle. It can score lines into the material.
- One final tip – sniff the fabric cleaner before you use it. Make sure you can live with the smell before you spray it all over the interior of your car.
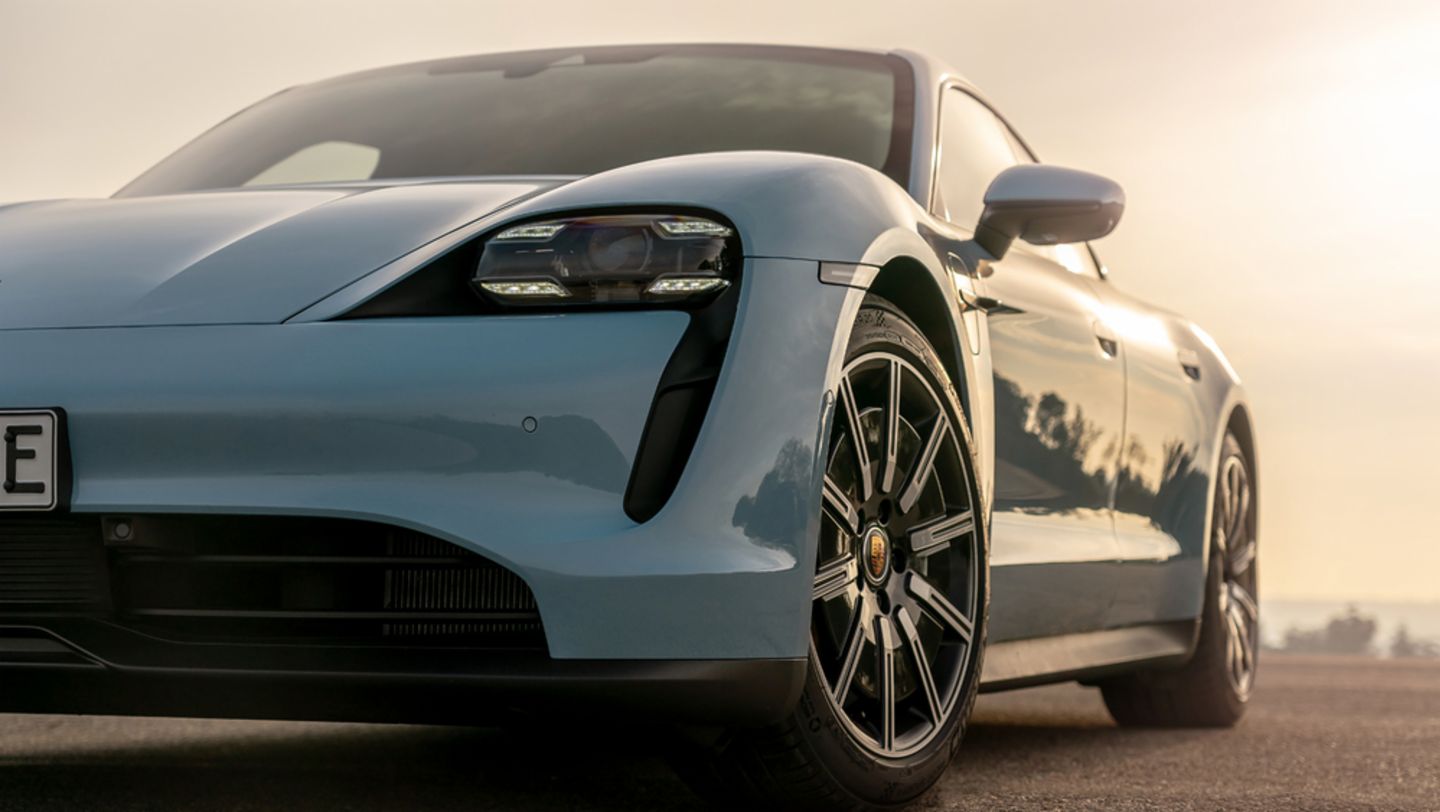
Wheel cleaning like an expert
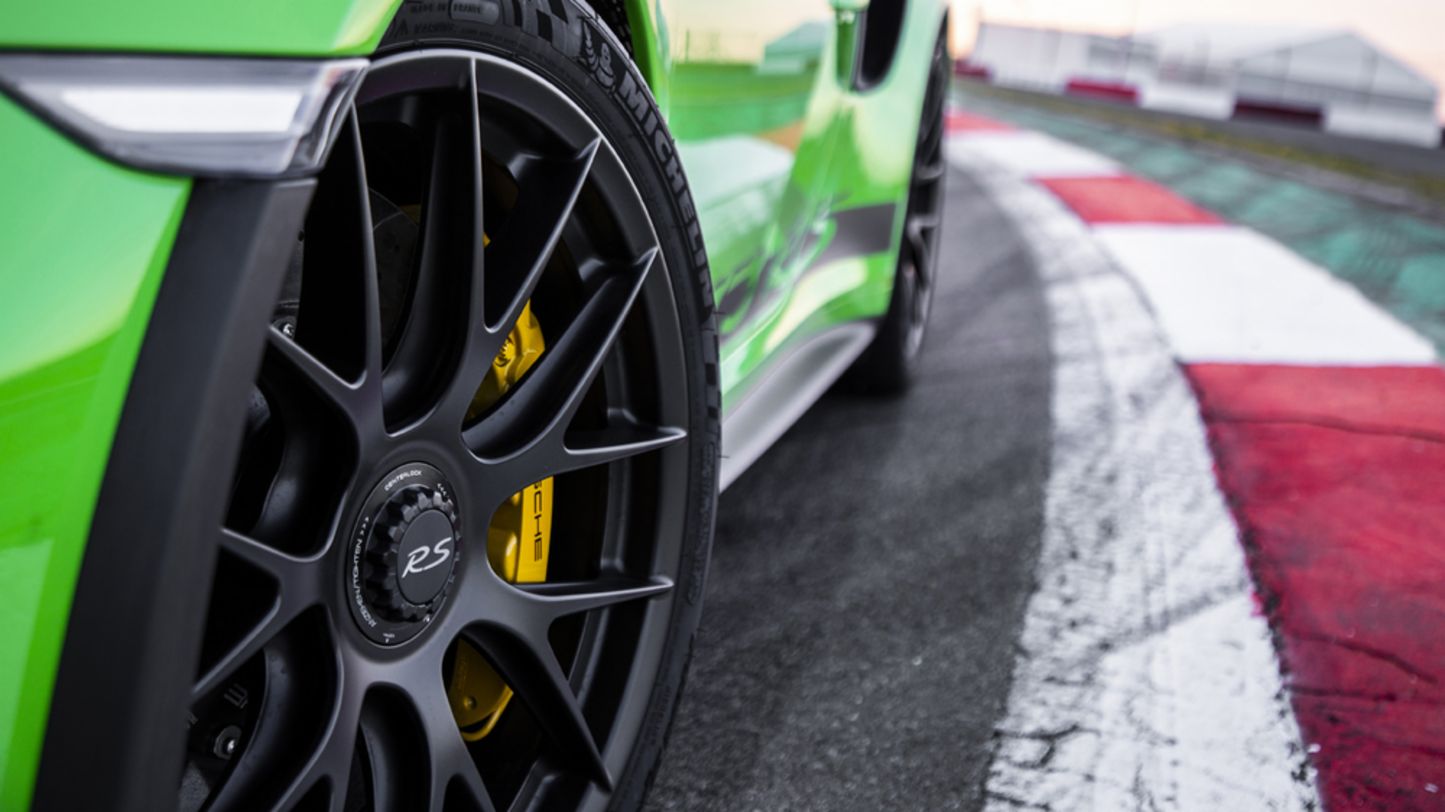
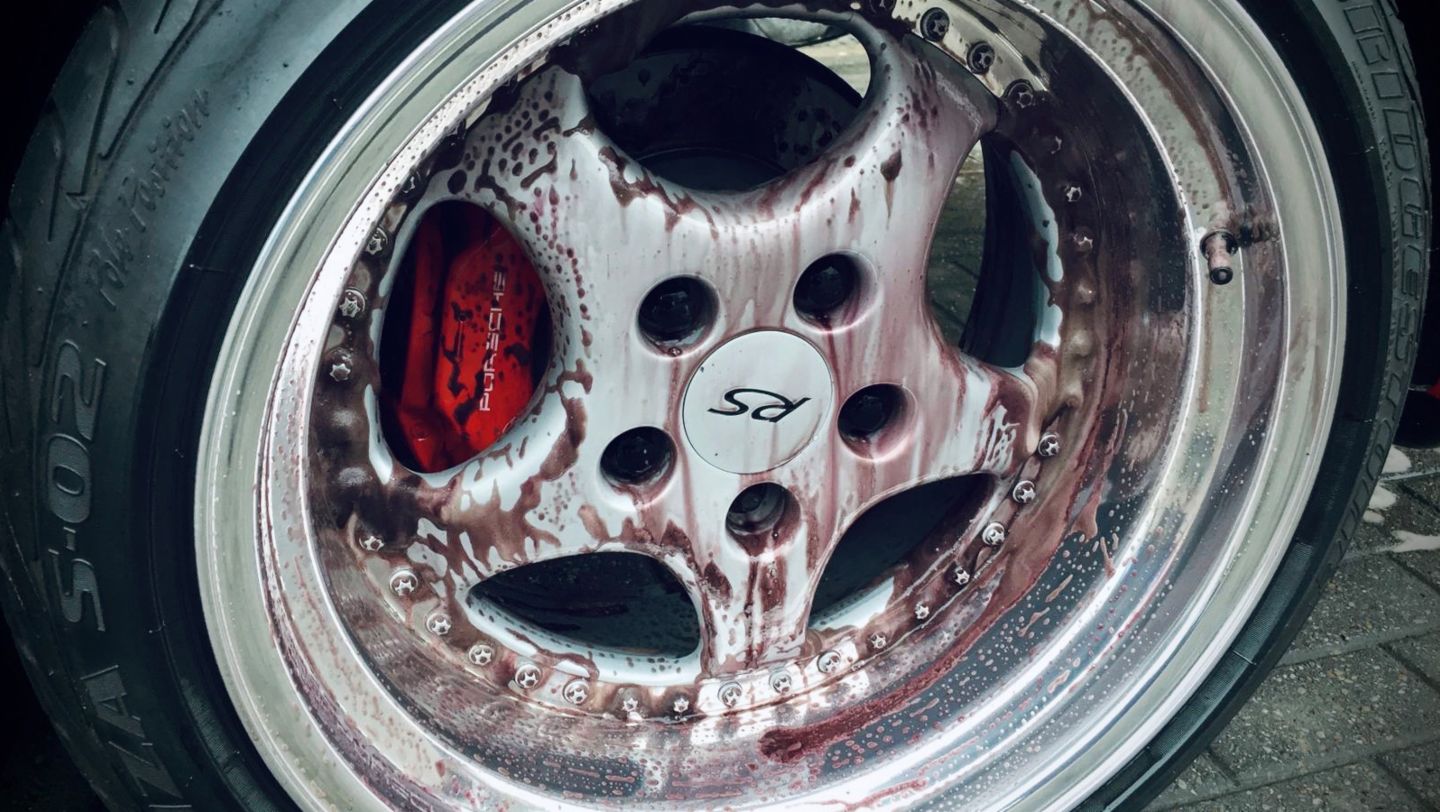

It’s best to do the wheels before you wash the rest of the car, as they are often the dirtiest part of the whole vehicle. Use a different bucket for this bit.
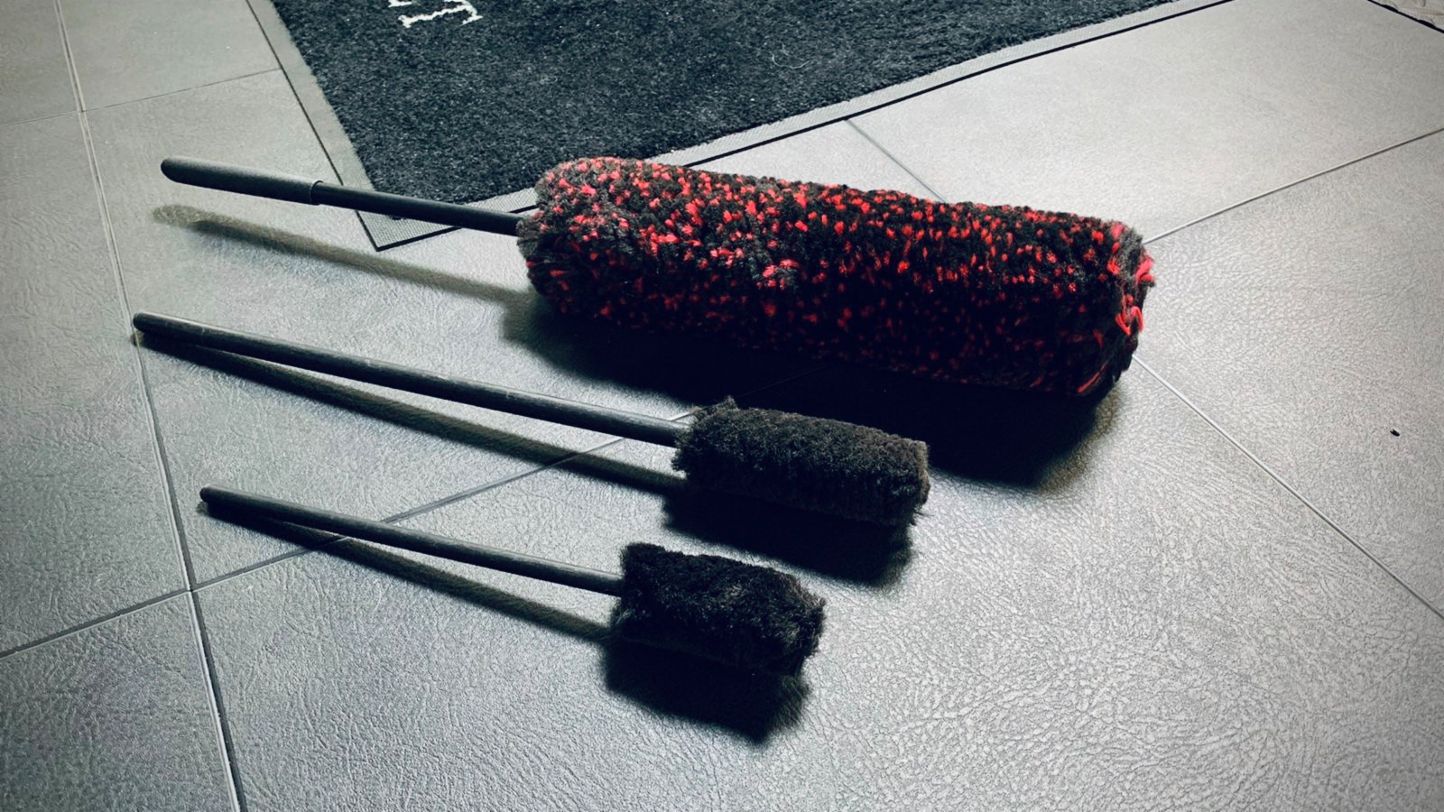
- Invest in some soft ‘wheel brushes’, which are usually made out of microfiber, not bristles. Choose a set with plastic handles, rather than metal, to help prevent scratching.
- You’ll also need a deionizing decontamination gel. I never use acidic wheel cleaners, especially on cars with Porsche Carbon Ceramic Brakes (PCCB), as the disc hub is anodized and the acid will damage the surface.
- But the gels work really well (other than stinking like rotten eggs) and have a color change technology in them so you can tell they’re working. Most will ‘bleed’ purple to show they’re reacting with the iron in the brake dust.
- The best way to clean a wheel is to take it off, but if you can’t do that, spray the decon gel on the cold wheel, trying to avoid getting it on the disc or pads as much as possible.
- Give it a bit of ‘dwelling time’, allowing the product to work its way into the nooks and crannies.
- Next, it’s onto the wheel brushes. These come in various sizes, so use whichever one is best for the area you’re working on. Use them to spread the decon gel around, paying particular attention to the valve and wheel nuts.
- Don’t forget the inside of the wheel to make a really thorough job of it. If you’re lucky enough to own a Carrera GT, you’ll find the caliper sits very near to the back of the wheel so it’s tricky to get a wheel brush in behind the alloy. Rotate the wheel by a quarter of a turn and then you’ll be able to clean that section as well.
- Finally, thoroughly rinse everything off. Please don’t blast the alloys close-up with a pressure washer – just a gentle rinse will do.
- Some people use tire shine as a final flourish, but one warning: avoid it if you leave your car under a cover, as it’ll smear itself all over the inside of the cover.
The safest way to wash a car

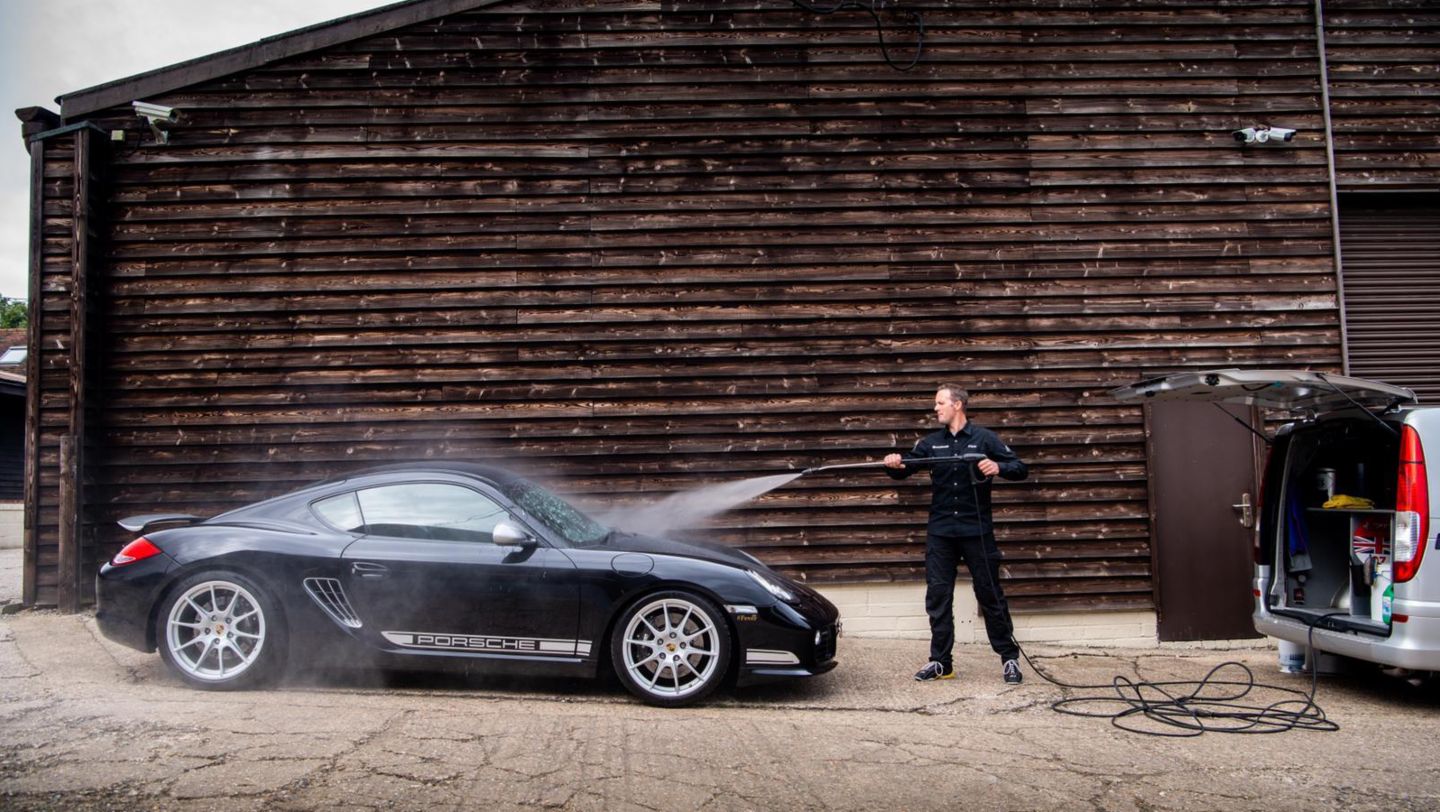
Always wash your car out of direct sunlight. Make sure the car is cool and, if you really want to make your life easier, keep away from trees or any blustery corners of your driveway.
If you look carefully at your car, you’ll probably see a series of scratches and swirls across the paintwork. What a lot of people don’t know is that most of these come from simply washing your car so it’s really important to avoid getting any grit or dirt on your wash mitt.
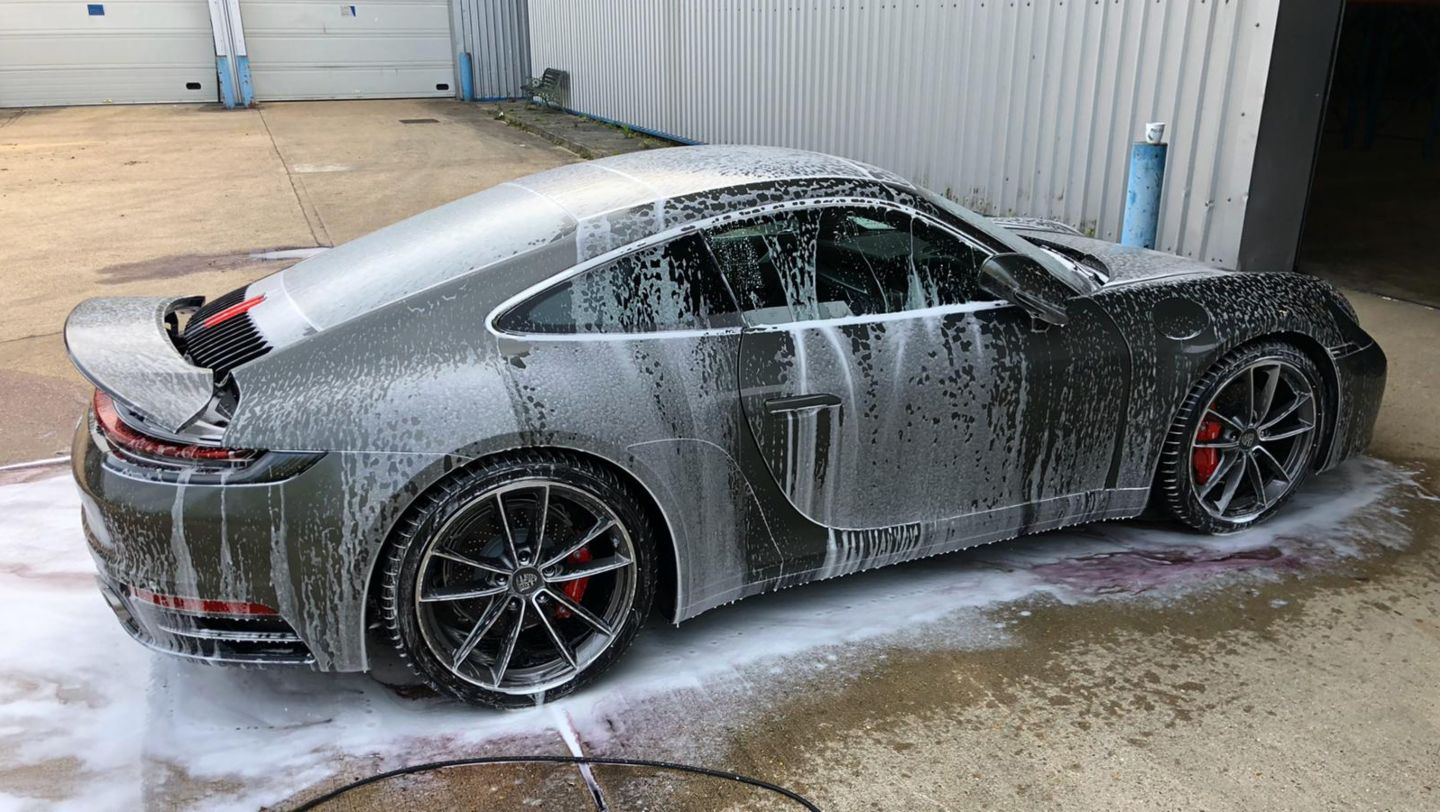
- Use a snow foam or pre-rinse agent. They’re easier to apply with a pressure washer but if you don’t have one, you can get products that will work with a hosepipe. Make sure you soak the whole car.
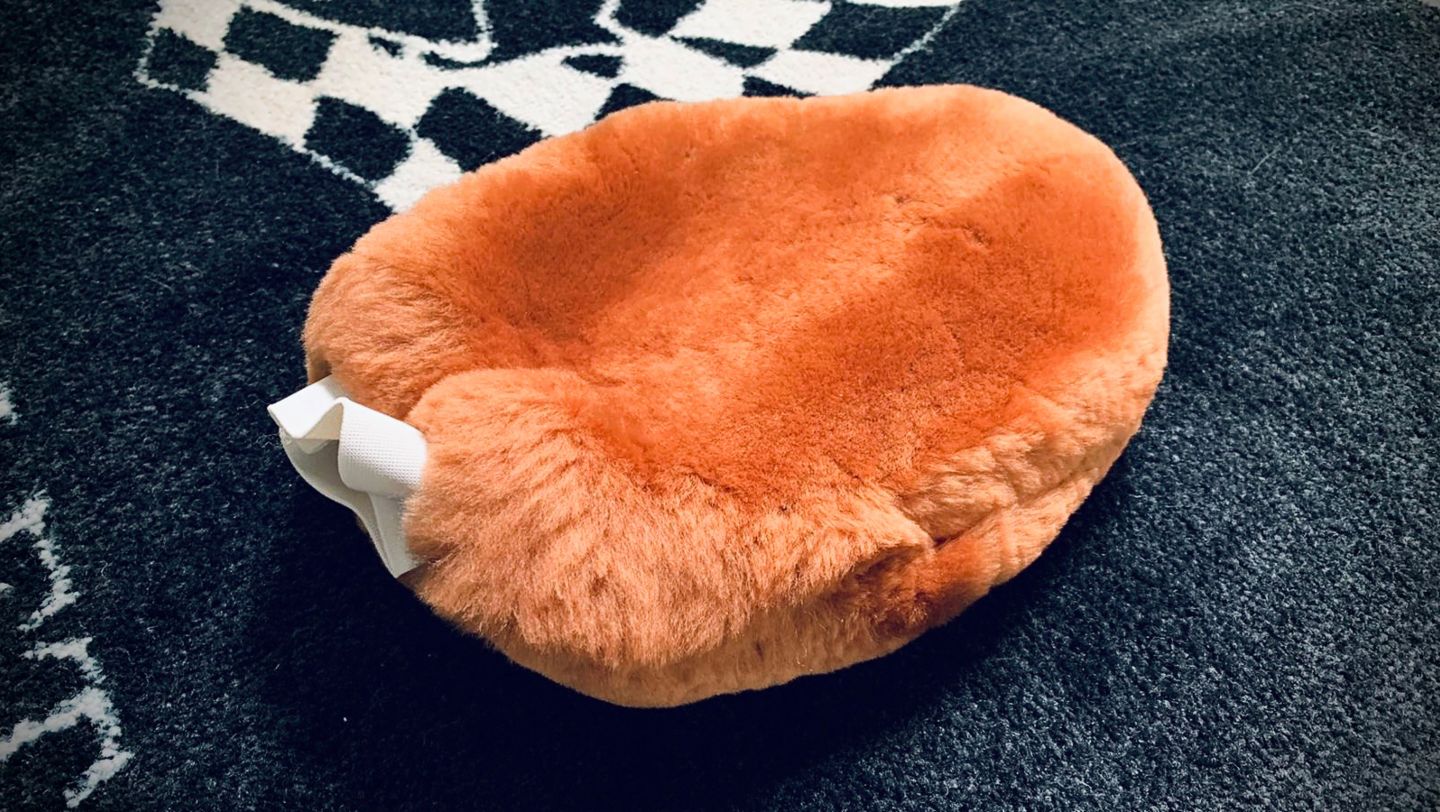
- You need a good wash mitt – these should be either synthetic lamb wool or microfiber and as soft as possible – and a grit guard for your bucket. The grit guard is like a drain cover that allows the dirt to fall to the bottom of the bucket, preventing your wash mitt getting dunked in the muck.
- I also use the two bucket method. Dip your mitt into the one with soapy water, lather over the car, then rinse the mitt in the bucket filled with plain water. Back into the soapy bucket, back onto the car and repeat. This eliminates as much grit as possible.
- Start on the roof and work your way down, doing the dirtiest parts of the car last.
- Hose it all off and then grab your microfiber drying towel. These are very thick and absorb lots of water. Lay it across the car, let it soak up the water and then gently drag it off. Don’t bother with a leather – I haven’t for over 20 years as microfiber towels are much better at leaving a streak-free finish.
- Finally, and for the ultimate finish, grab an automotive dryer. These blowers will get the water out of the crevices, like hinges and petrol filler caps, and are especially good on finishing off matt surfaces.
- One final tip – don’t use squeegees. Even the cleanest will have some dirt on them and you’ll just drag that across the paint surface, leaving a fine scratch.
How to clean your engine safely
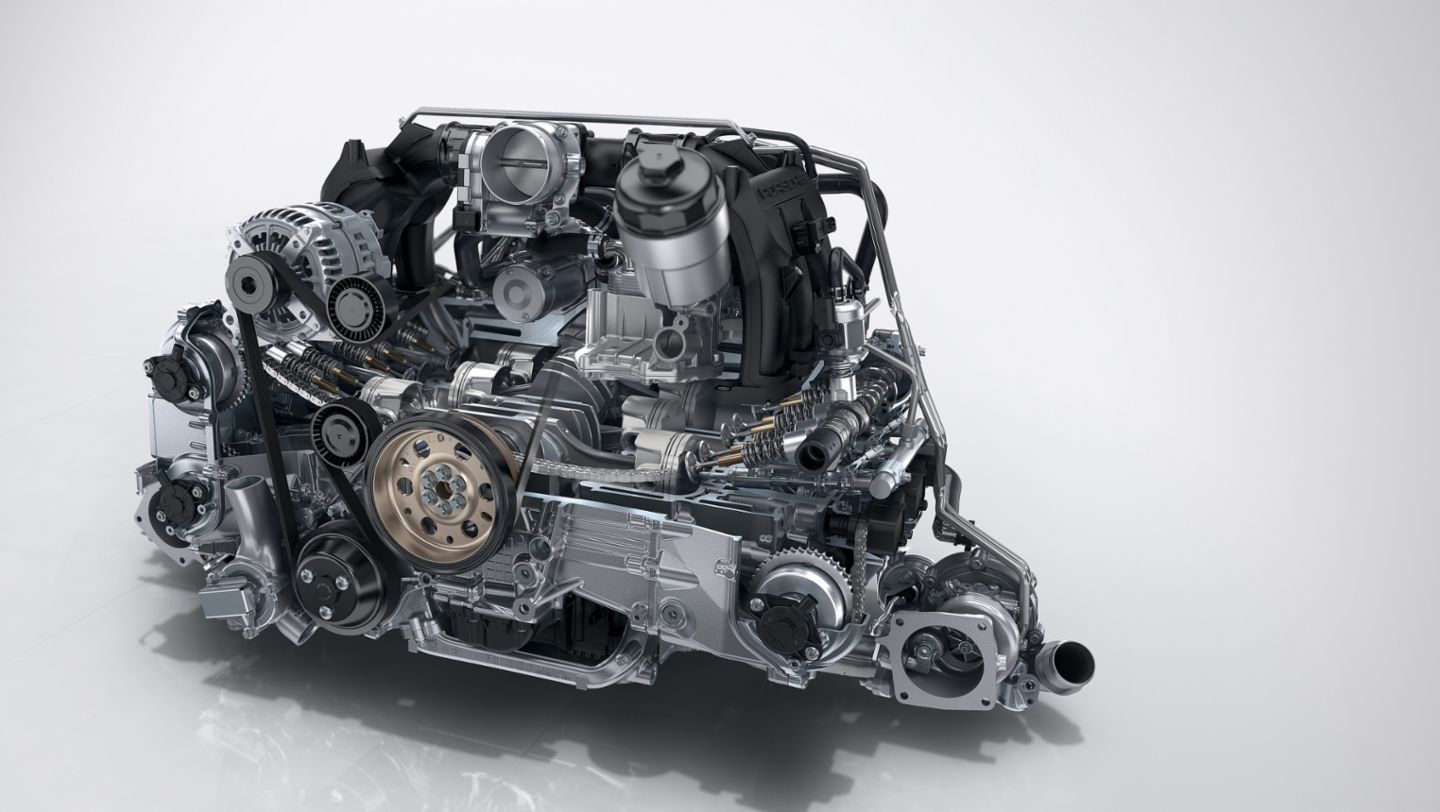
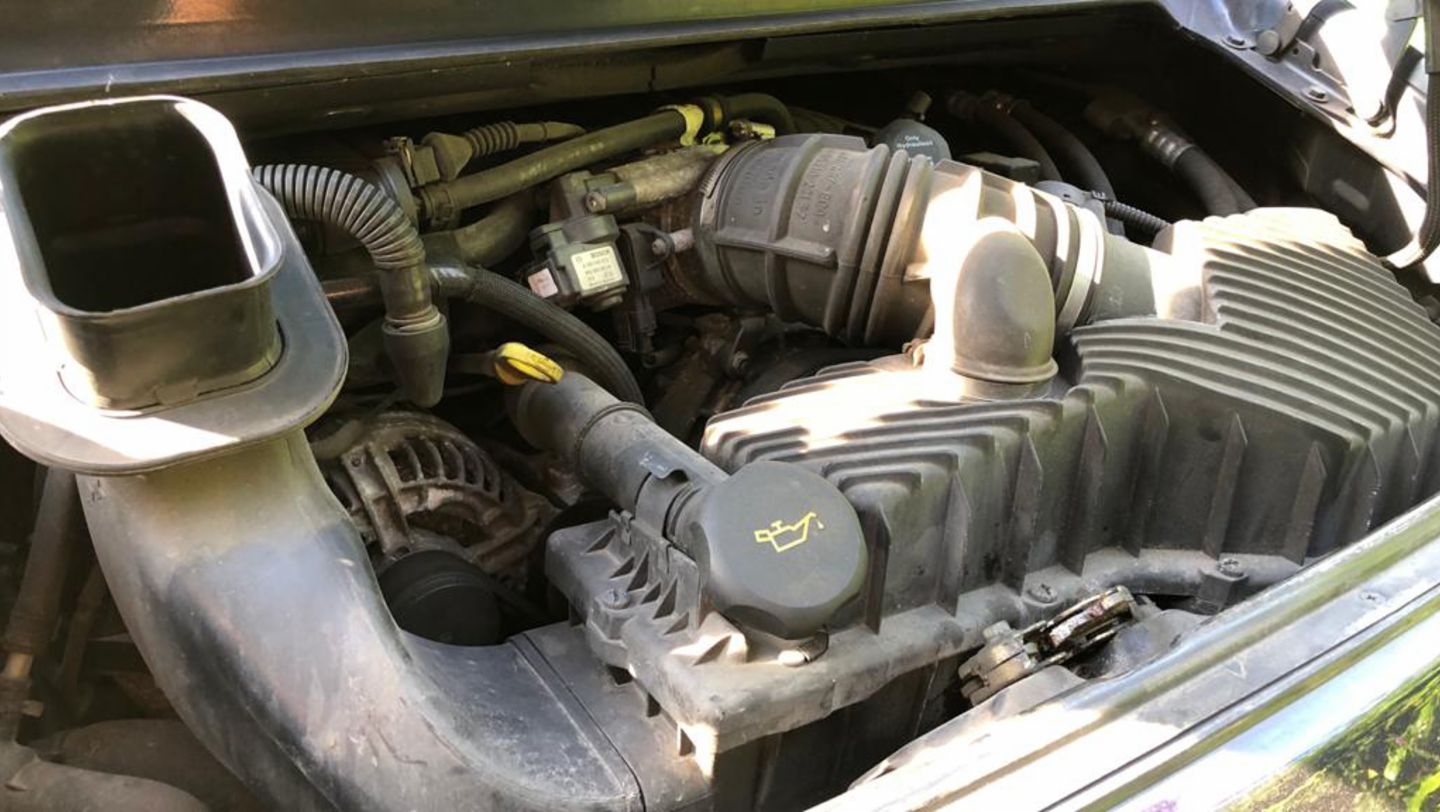
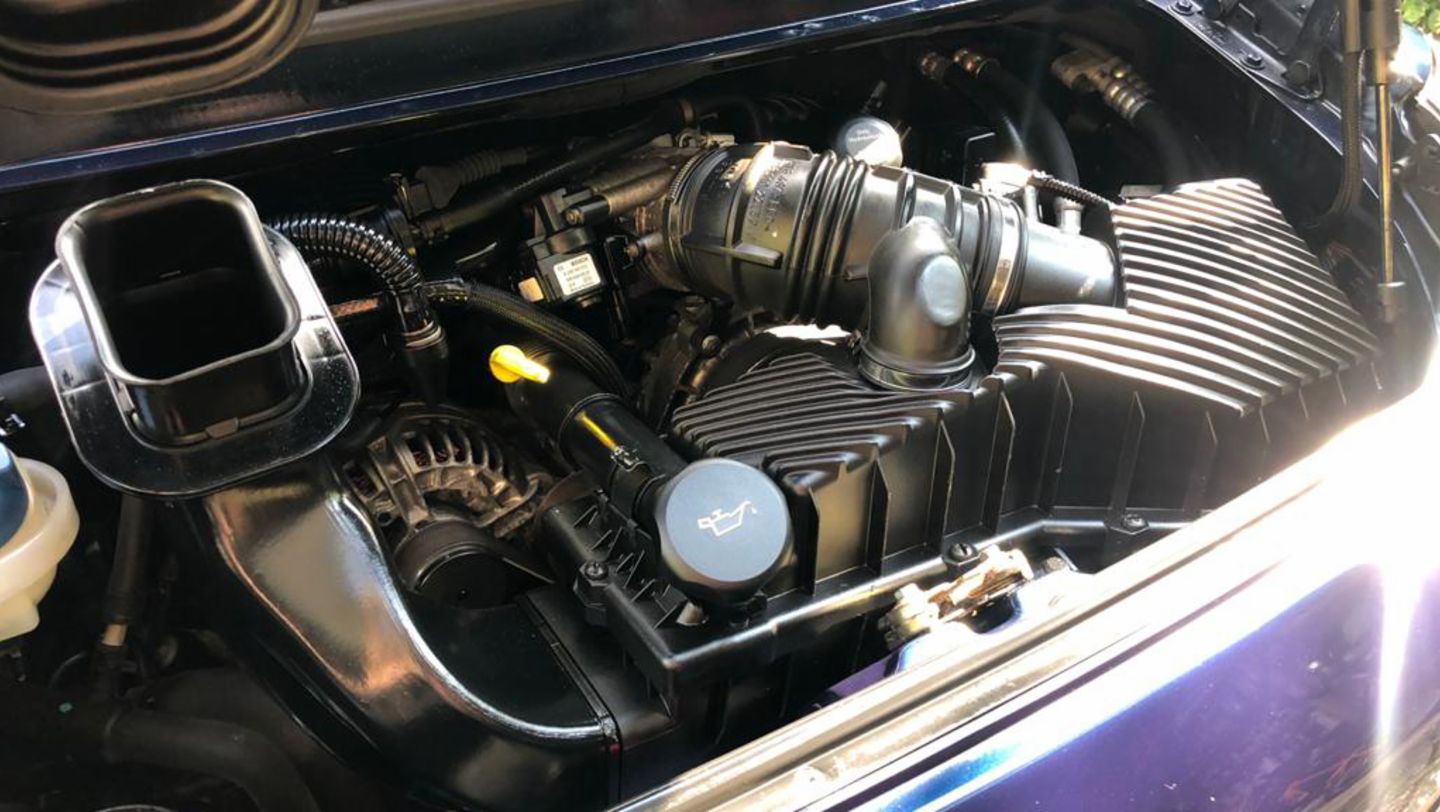
This is the heart of the car and although all engines are weather-sealed, they’re not designed to have high pressure water fired at them. So it’s best to go very, very carefully when you’re cleaning your engine, but there are methods that don’t involve drenching it in water. Detergents can be very effective, especially in something like a Porsche 911 – with the engine being out at the back, it can get very dusty back there.
- Make sure the engine is cold before you start. Choose a multi-purpose cleaner that has a lower solvent content, because it’s less likely to perish any rubber it comes into contact with.
- Concentrate on spraying one section at a time, so you don’t spray too much cleaner all over the place and find it dries before you have a chance to rub it off.
- Then use microfiber cloths to lightly touch up the top surfaces. Have some brushes handy as well, for the nooks and crannies that the cloth can’t get to.
- It’s a good idea to do a general maintenance check on the engine while you’re doing this. Even if you’re not mechanically-minded, you can always refer to the handbook then check the tension on the belts, or make sure that bearings are lubricated.
- I always have a look at the electric spoiler and check that it’s well-oiled, again checking I’m using the correct product.
The secrets of polishing

Before you start any polishing, make sure the car is completely clean. You want the paint to be as smooth as possible so that the polish will bond to it – all-in-one polishes clean, recover the gloss and protect the paint, so if you have a smooth surface, the polish will adhere to the paint for longer, giving better protection.
- I use a clay bar, a biscuit-shaped putty, to get rid of the last bits of contaminants that have bonded to the paint. Even the best wash still leaves tiny tar spots or carbon deposits.
- Spray the clay bar lubricant onto a small area of the car and then gently rub the clay bar in straight lines over the same area. Let the tool do the work – only apply a light pressure.
- You’ll know when it’s done its job because it will glide silently across the surface.
- The clay bar absorbs these deposits so keep surface of the clay bar clean. Once you’ve finished one section, fold the clay bar over on itself so you’ve got a fresh surface for the next bit. Depending on how many deposits your car has on it, you should be able to clay bar a car three or four times before you need a new one.
- Next is polishing. For an all-in-one cream polish, take an applicator pad (a piece of sponge wrapped in microfiber cloth) and put four pea-sized drops of polish onto the pad. That should do an area of about two square feet. Start in the center of the panel and polish in straight lines – you’ll know you’re using the correct amount of polish if you can barely see it once you’ve rubbed it on.
- Check the manufacturer’s label to see how long you should leave the polish to dry and then take a second microfiber cloth and start to remove the polish. This should be a soft material and I even remove the labels to prevent any risk of scratches. Fold it into quarters – don’t scrunch it – and then, with one hand splayed out, lightly rub the polish off until the microfiber glides easily over the paint.
- Don’t do any plastics, glass, rubber seals and matt carbon fiber, as the polish will turn them white. You can polish gloss carbon fiber, though.
- If you want to do your windows, I’ve found the best way is to have two microfiber cloths. Wipe the damp one over the glass and then immediately dry it with the other one.
- One final thought – there are some great automotive hard waxes out there that you can use instead of the all-in-one polish. You’ll need a sponge applicator instead of the microfiber one but be even more sparing with these products. Partly because they’re expensive but also because if you use too much, you’ll only clog up the microfiber cloth that you use to remove it. Once you’ve applied the wax using the same technique that I’ve talked about above, being quick about wiping it off. Most should only be left on for 60-90 seconds.
- After all that, sit back, relax and give yourself a pat on the back. You’ve protected your paint for at least the next six washes (more like 10-15 with the wax) and your car will be sitting pretty on your drive, ready for when you can next go for a drive.